FAQs
Custom Checkout & Discounts
How to create a custom discount?
There are two ways to add a custom discount. They are as follows.
Method 1
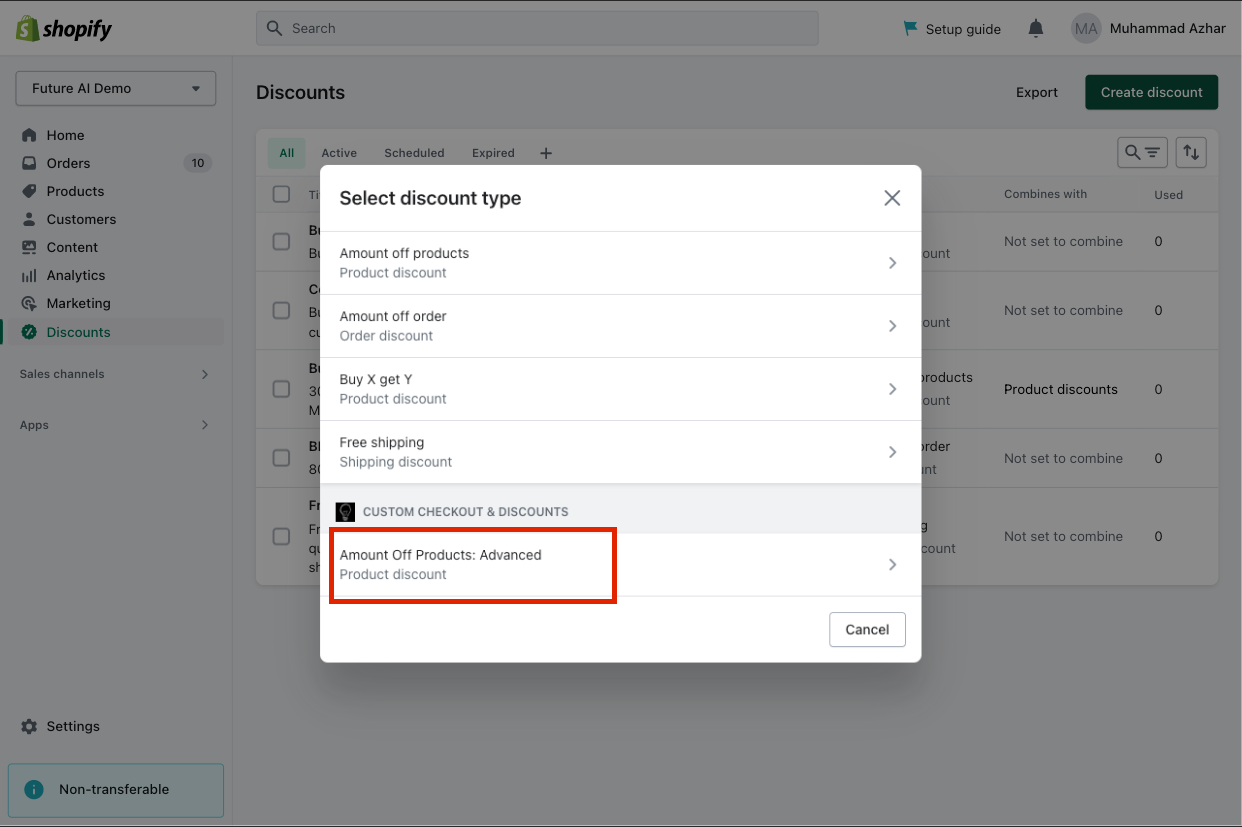
Open up Shopify Admin and click on Discounts from the navigation. Here you can see a green button to create new discounts.
Clicking on that will open up a popup with the different types of discounts that you can create. Click on any of the products under Custom Checkout & Discounts.

Method 2
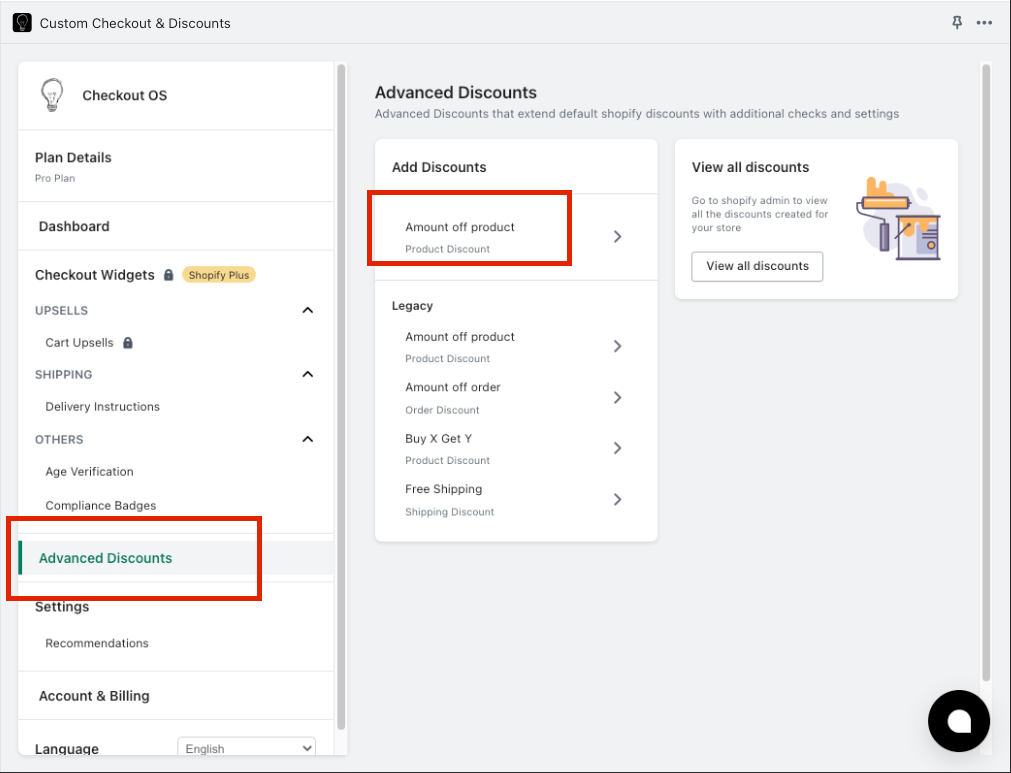
Open the Custom Checkout and Discounts app and navigate to Advanced Discounts in the sidebar. Click on any of the discount types available above. If you would like to add a regular Shopify discount, then click on any of the discounts listed under Legacy

Inventory Planner
How to update a forecast?
There are three ways to edit a forecast.
Option 1
Click on Forecast from the sidebar navigation to view all the forecasts that have been generated for your store. Here you will see the forecast for each variant each month. You can edit the sales quantity directly by updating Forecast Override. If you would like to update it relatively with a percentage instead, you can update Percent Override.
Once you are done with the changes, remember to click on Save Changes to save your changes.
Option 2
If you would like to increase all the sales quantity by a percentage, you can select the variants (rows) and then edit them in bulk.
Note that this facility will only be available if the previous bulk action has completed running.
Option 3
Clicking on any row from the Forecasts or Replenishments screen will open up the Forecast Details popover for that variant. You can jump over to the Forecast tab and edit the forecast over here.
All screens show an empty state. Why is this happening?
Ensure that the data is syncing in real-time. This could take a couple of minutes to complete. You can find the status of the sync at the topmost section of the sidebar menu. Forecasts and Replenishments are only generated after data has been synced.
Please note that having an inventory of existing products is crucial. A rich order history will provide us with more data to give you better forecasts.
